Edit subordinate nodes
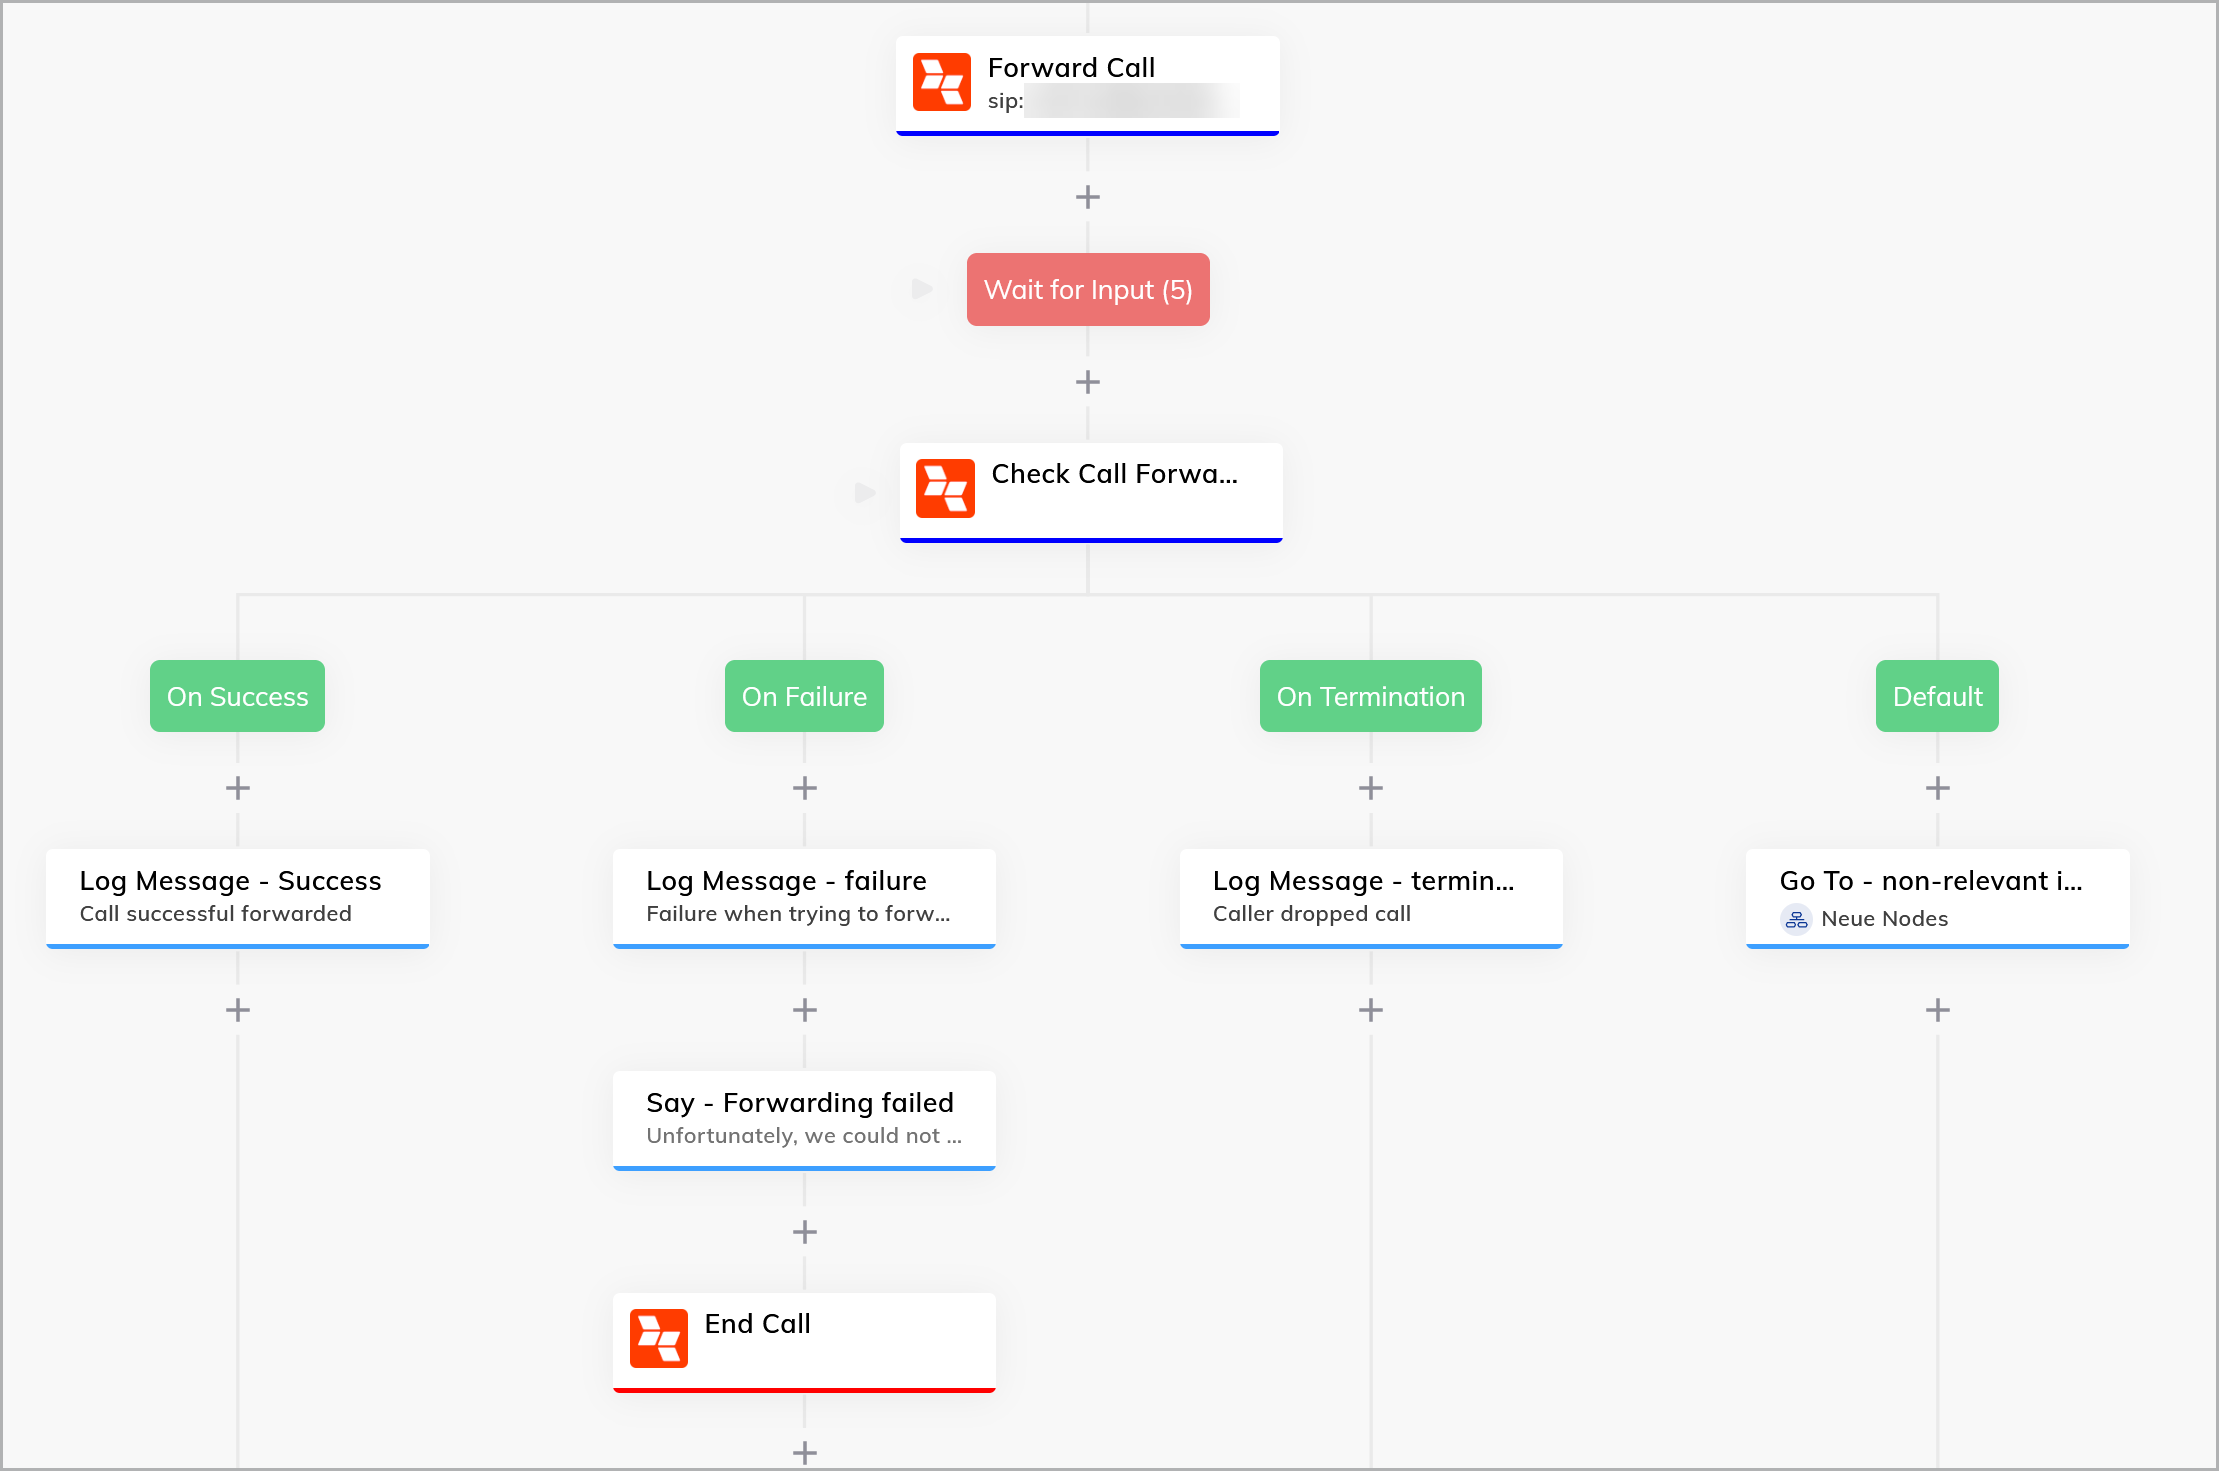
Within the Check Call Forwarding Result node you have the option to further configure the following subordinate nodes:
- On Success
- On Failure
- On Termination
- Default
NOTICE
Default Result
If a call forwarding result has nothing to do with the actual call forwarding, then a default result occurs. This is the case, for example, when an event is received indicating that a recording has been made. In order to check the actual result of the call forwarding, it is then necessary to integrate a Wait for Input node and a GoTo node for the result of the call forwarding into the flow.

How to edit a subordinate node of Check Call Forwarding Result:
- Click on the specific node.
- The window with the configuration options opens.
- Optionally assign a different Label under Settings. This label will be displayed in the Chart.
- Add a Comment if required. This comment will be displayed in the Chart in the node.
- or
see Add a new comment. - Enter an Analytics Step if required. This analytics step is recorded in Cognigy Insights when the node is executed in the dialog.
- To copy the node ID, click on the three dots in the configuration window.
- Click Copy Node ID.
- To disable the node, click on the three dots in the configuration window.
- Click Disable.
- The node is grayed out in the chart and is no longer active.
- To re-enable the node, click on the three dots in the configuration window.
- Click Enable.
- The node is displayed in color again in the chart and is active again.
- To insert a connection between the node and another node, click on the three dots in the configuration window.
- Click Set Entrypoint.
- The connection has been inserted into the chart.
- To remove a connection between the node and another node, click on the three dots in the configuration window.
- Click Unset Entrypoint.
- The connection has been removed from the chart.
- To save the settings click Save Node.
- To discard the settings click Cancel.
- The settings have been saved.